Windows 11, packed with a plethora of handy features, allows you to automatically turn off your computer screen after a prolonged period of inactivity. This functionality serves multiple purposes: it helps preserve battery life and prevents unauthorized access to your device.
By default, this screen timeout feature is active on your Windows 11 system. Nevertheless, you can adjust the screen timeout duration to fit your personal needs. Conveniently, there are several methods available to change the screen timeout duration in Windows 11, which cater to both novice and experienced users.
So, without further ado, let’s dive into these methods one by one!
Best Methods to Adjust the Screen Timeout Duration on Windows PC
Below are various ways you can modify the lock screen timeout on your Windows 11 PC:
1. Adjust the Lock Screen Timeout via Windows Settings
The built-in Windows settings app can be used to change the timeout settings on your Windows 11 PC. Here’s a step-by-step guide to adjusting the Windows 10 screen lock timeout settings:
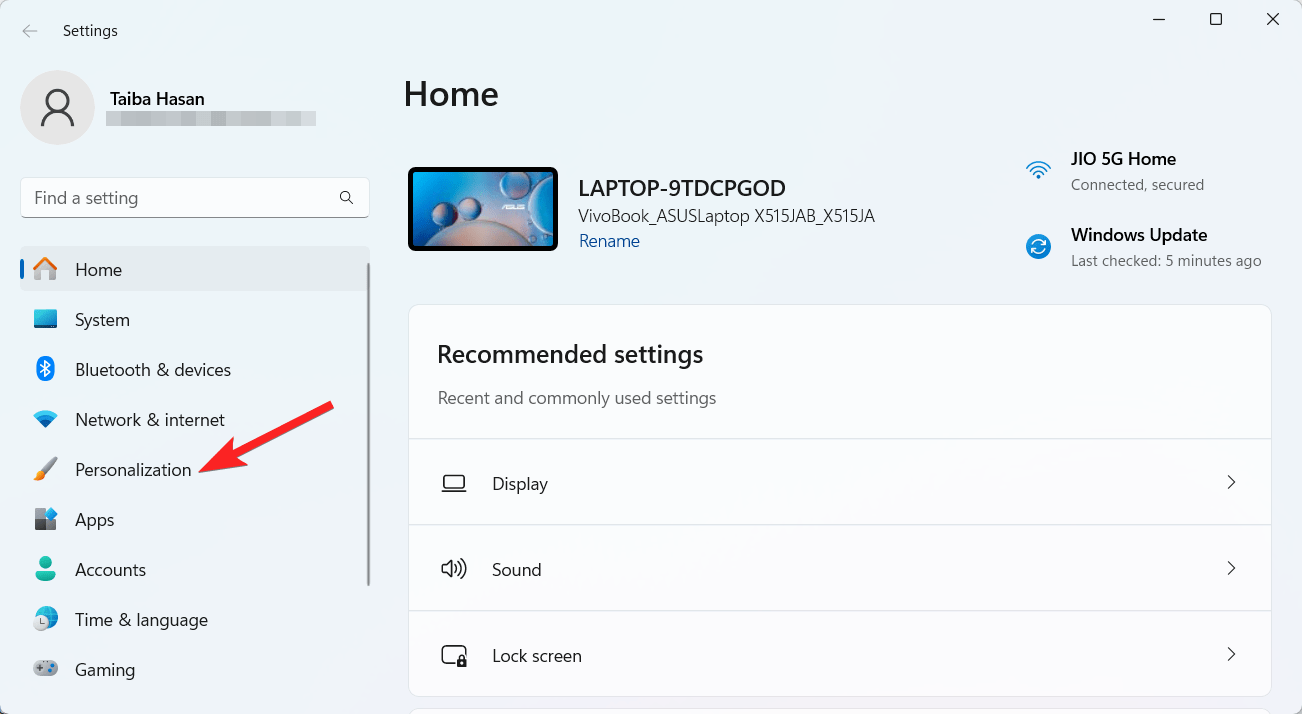
- Open the System Settings app using the Windows + I keyboard shortcut.
- Select the Personalization option from the left sidebar of the Settings window.

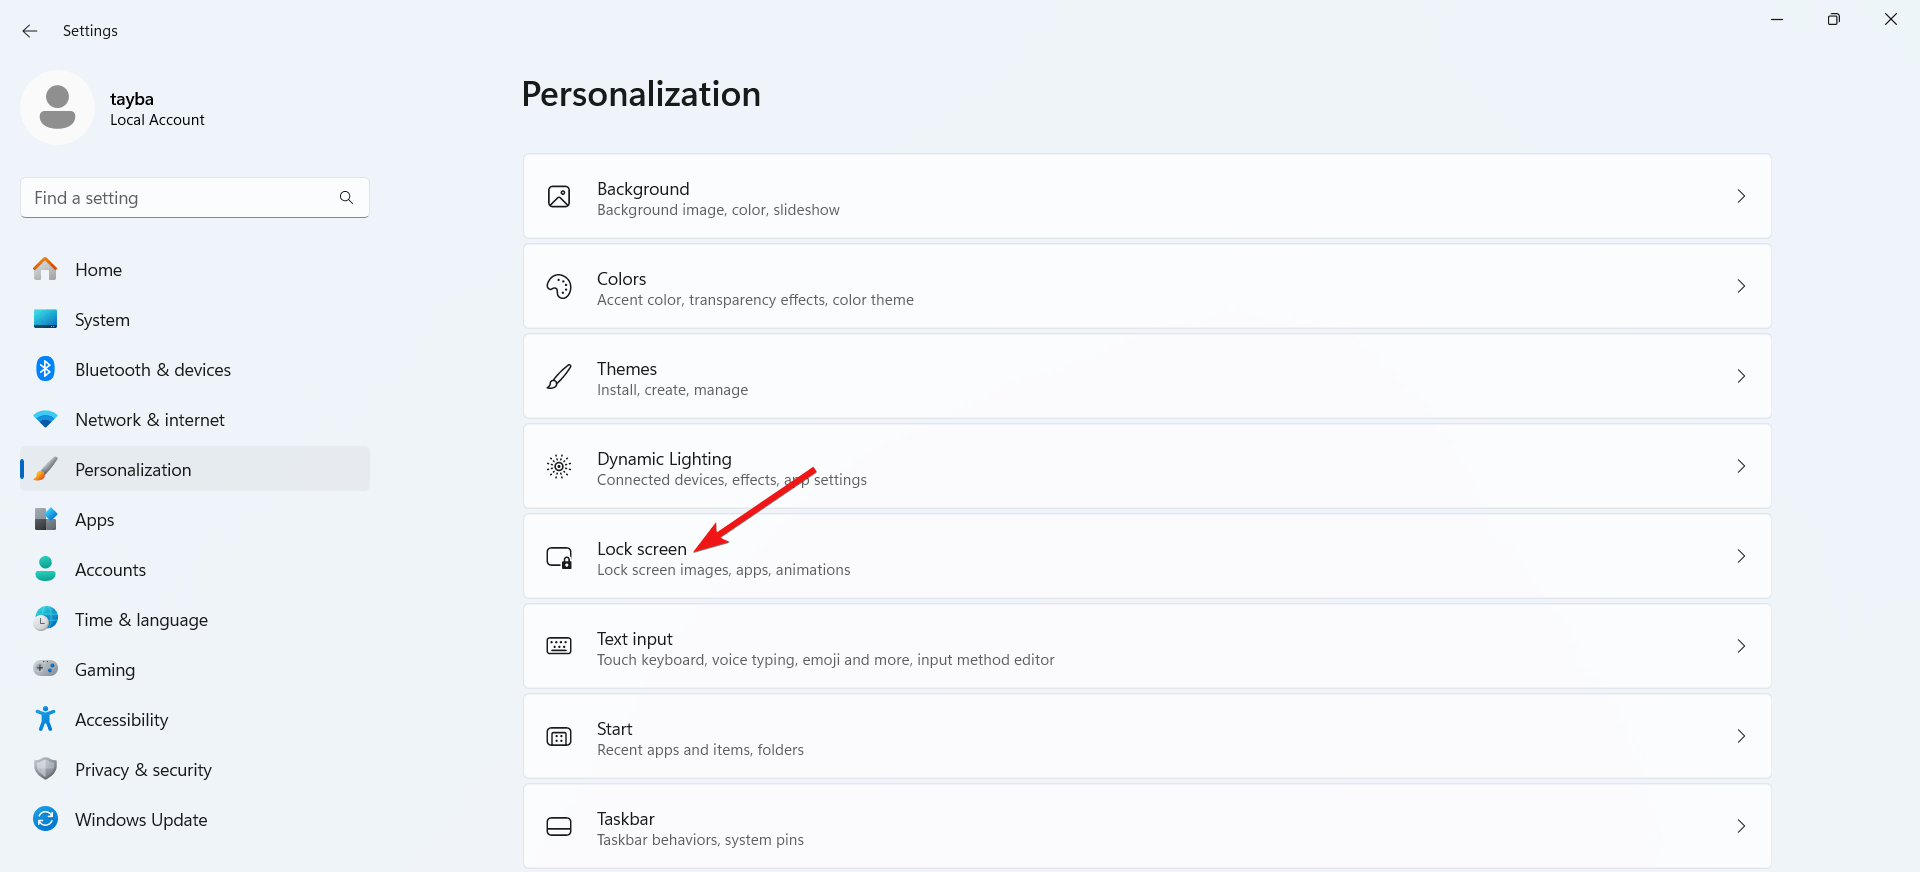
- Click on Lock Screen from the right side of the panel.

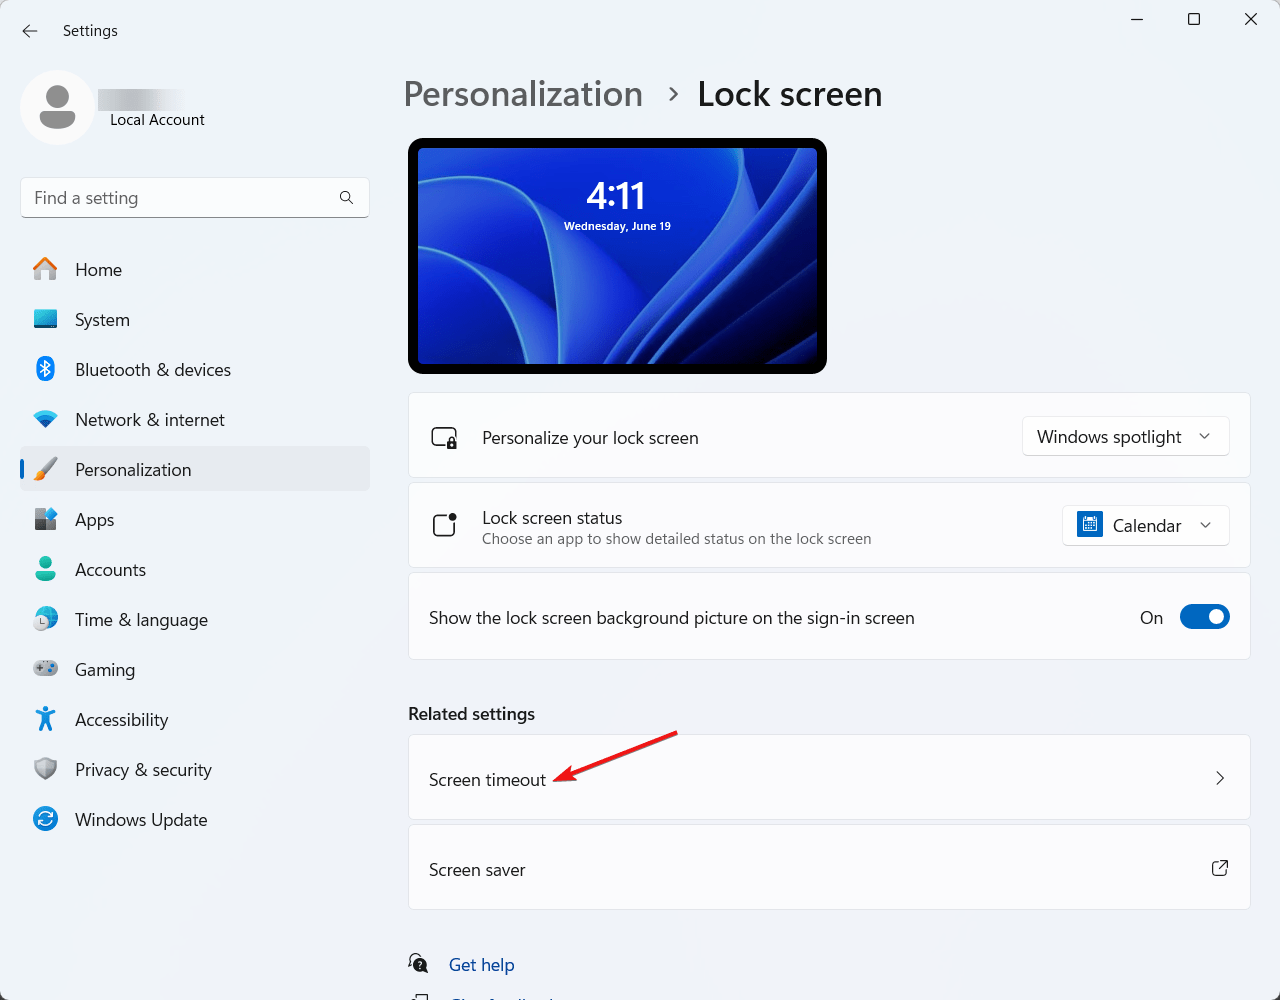
- Next, find the Screen timeout option under the Related settings section.

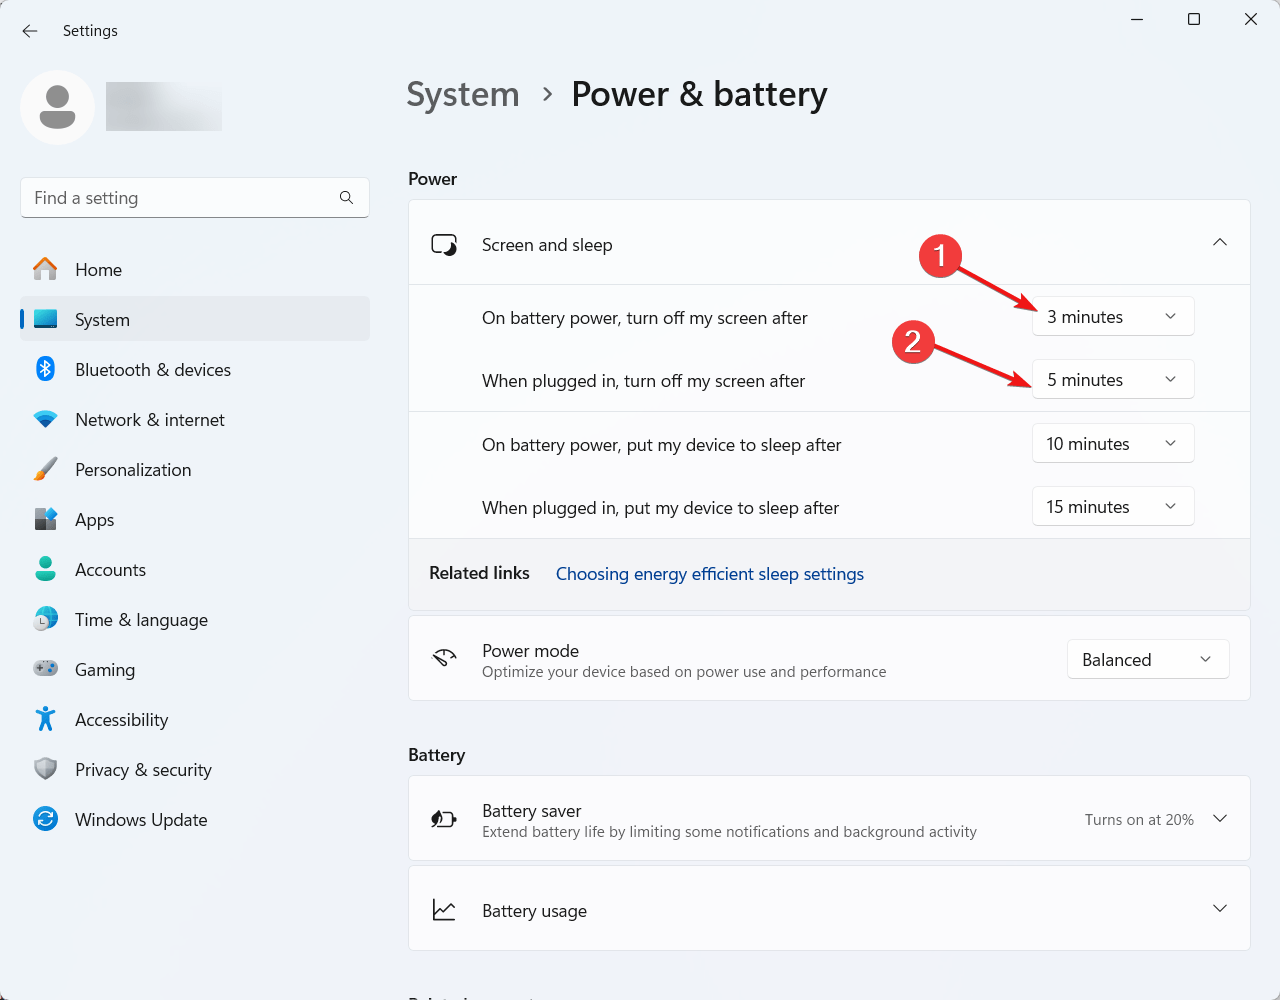
- Click on the Screen and Sleep option located under the Power menu to unveil additional options.

- Select the drop-down menu next to On battery power, turn off my screen after, and pick your desired timeout value.
- Similarly, open the drop-down menu next to When plugged in, turn off my screen after, and choose the appropriate timeout duration in minutes.

After making these changes, close the System Settings window and restart your Windows 11 PC to apply the new settings.
2. Configure Screen Timeout Settings via Command Prompt
Screen timeout settings can also be configured using the Windows Command Prompt tool. Follow these steps to proceed:
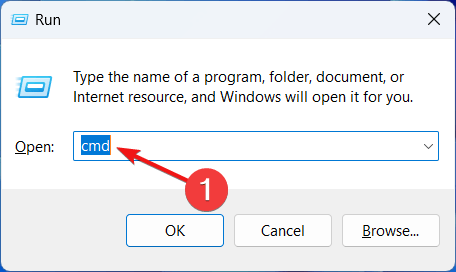
- Open the Run dialog box with Windows + R shortcut key combination.
- Type cmd into the text box and use the Ctrl + Shift + Enter shortcut to open Command Prompt with administrative privileges.

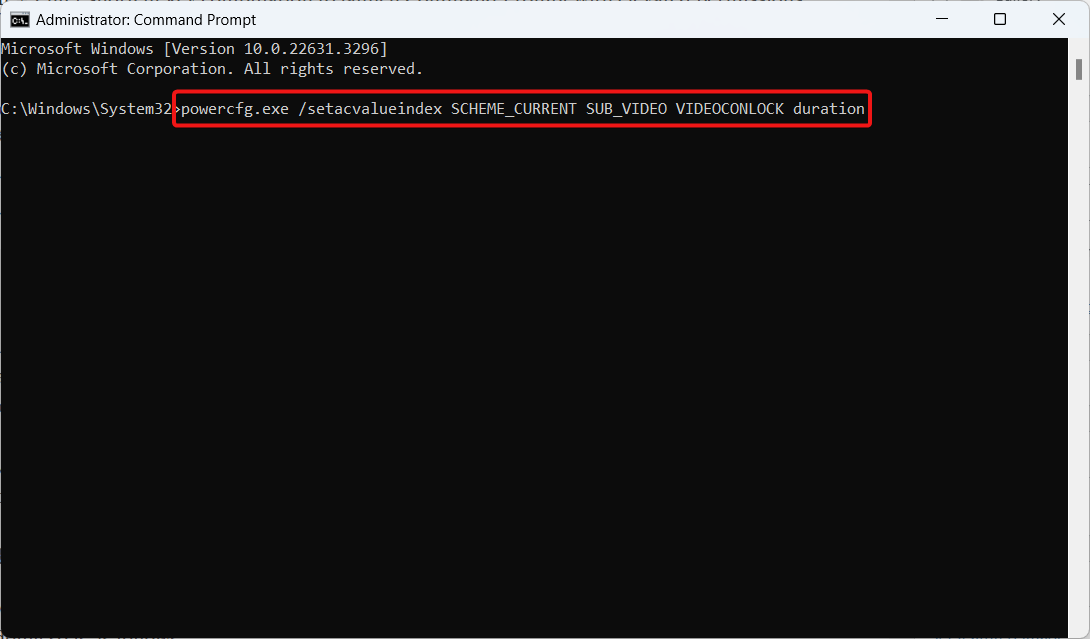
- One by one, type the following commands and press Enter after each to execute them. Replace duration with the time limit in seconds after which you want the lock screen to activate.powercfg.exe /setacvalueindex SCHEME_CURRENT SUB_VIDEO VIDEOCONLOCK duration

- Finally, run the following command to activate the current timeout scheme.powercfg.exe /SETACTIVE SCHEME_CURRENT
- Close the Command Prompt window and restart your PC.
3. Modify Screen Timeout Settings via Control Panel
Control Panel is an integral part of Windows 11, allowing you to adjust the time duration after which the screen turns off automatically if the device remains idle. Follow these steps to make the changes:
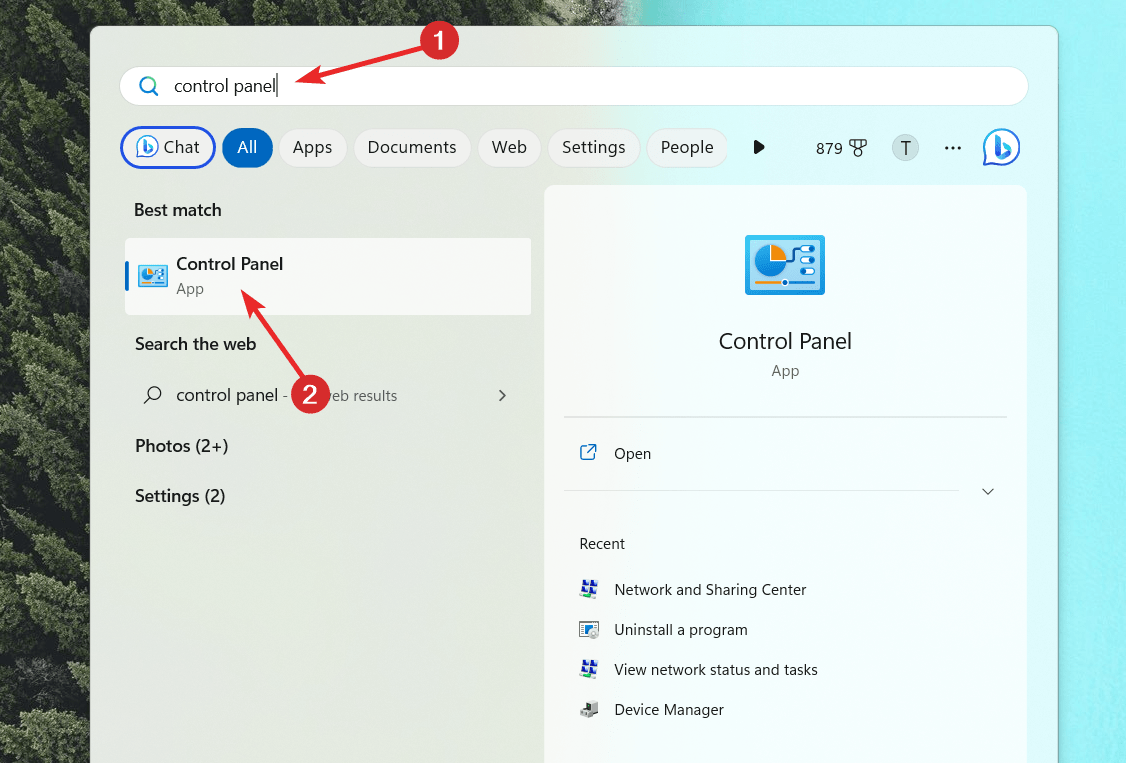
- Click on the Start button, type Control Panel in the search box, and then select the Control Panel icon from the search results.

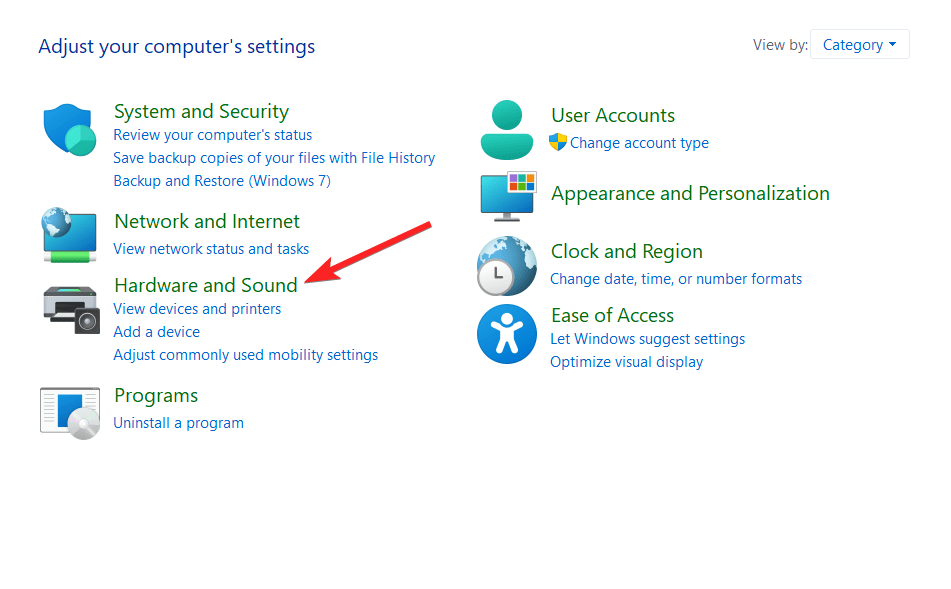
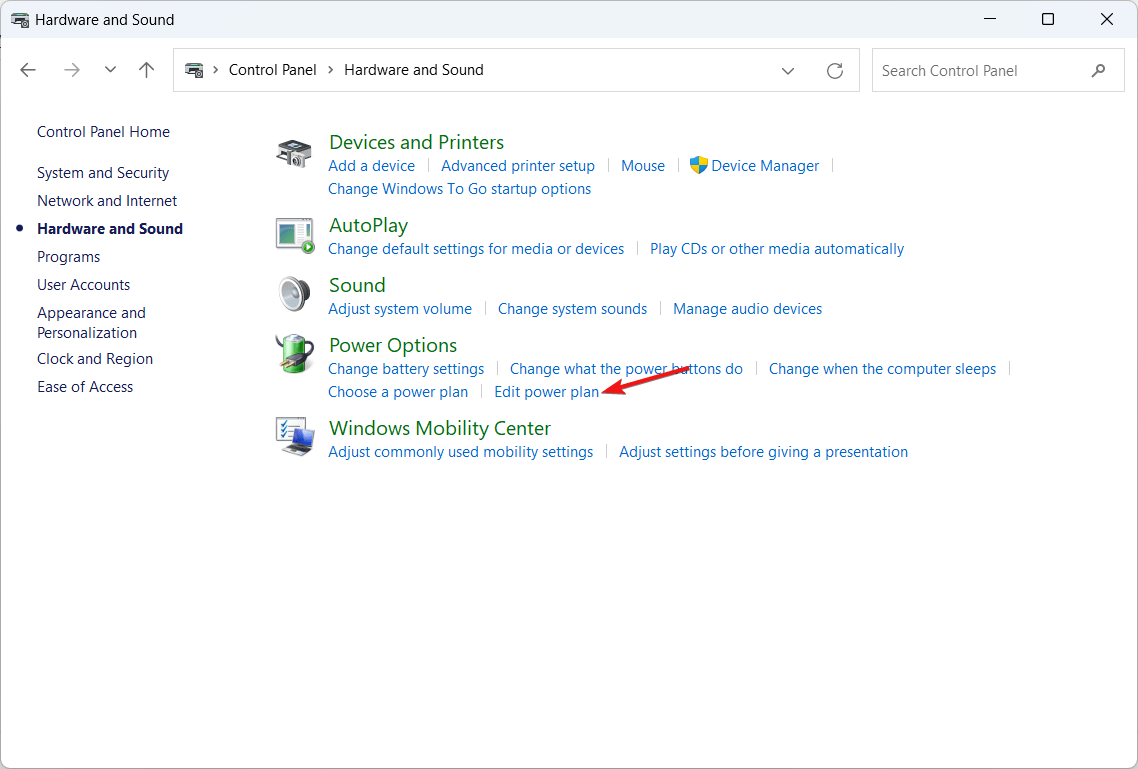
- In the Control Panel window, click on Hardware and Sound to access related settings.

- Next, click on Edit Power Plan under the Power Options section.

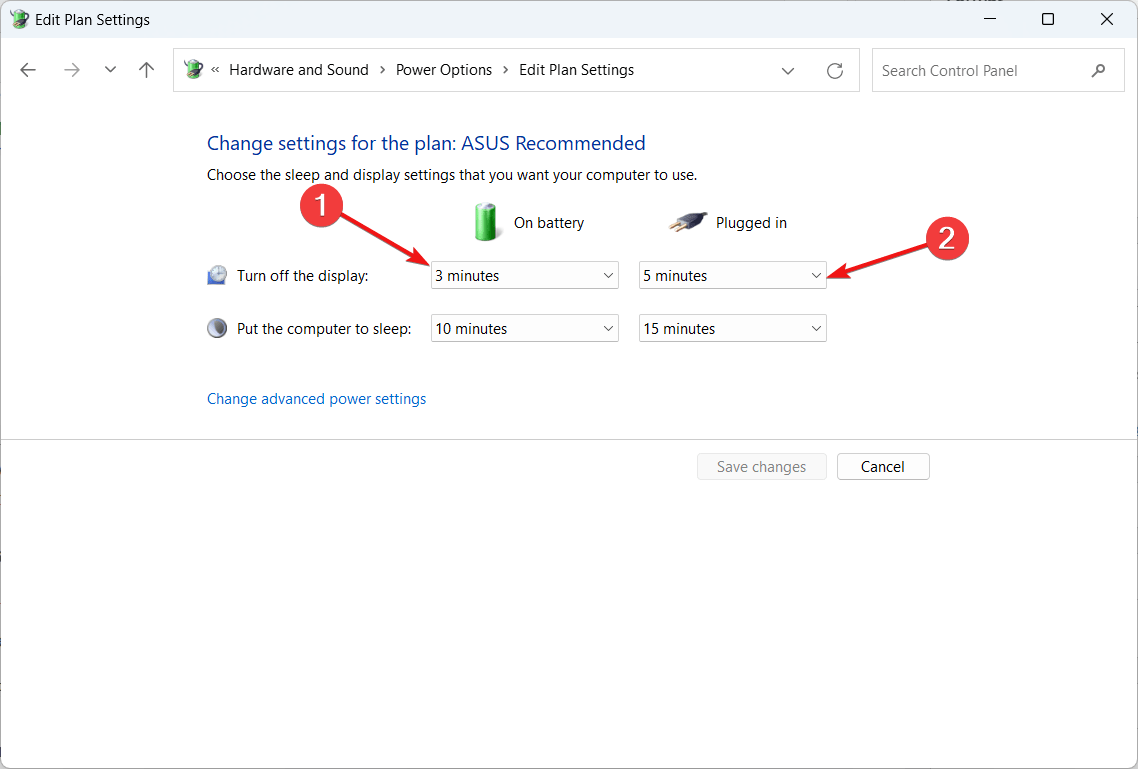
- Under the On battery and Plugged in sections, expand the Turn off the display dropdown and choose your preferred timeout duration.

- Hit the Save Changes button and close the Control Panel window to apply the changes.
4. Adjust Screen Timeout Duration Using Windows PowerShell
Similar to Command Prompt, the Windows PowerShell tool can help you change the screen timeout duration on a Windows 11 PC. Unlike the Command Prompt, this can be achieved with a single command in the PowerShell window. Here’s how you can do it:
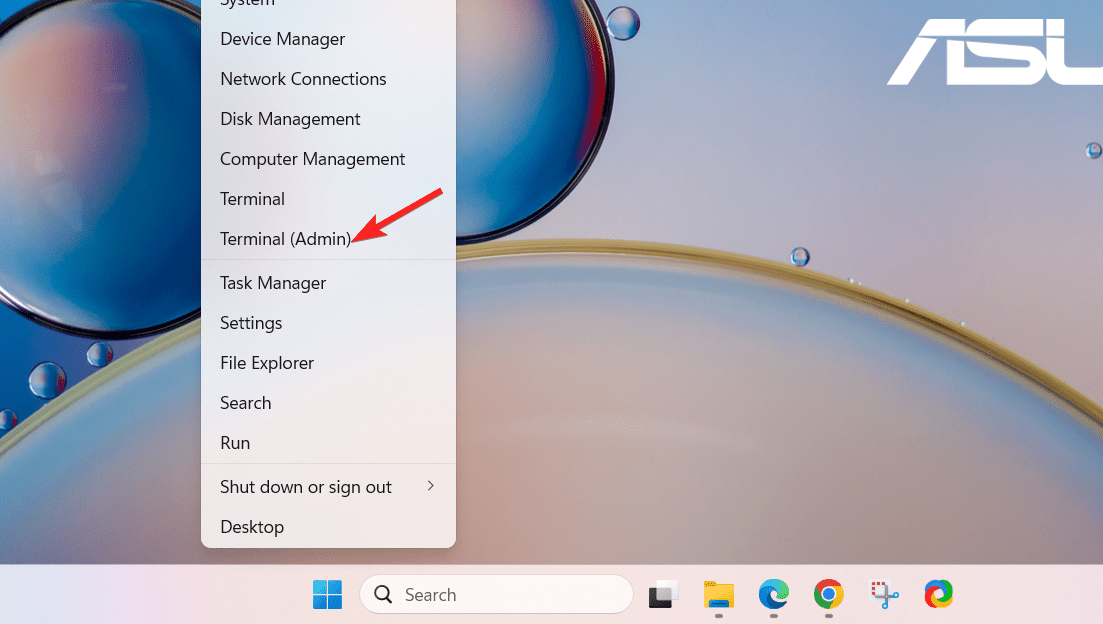
- Firstly, open the Windows PowerShell terminal. Right-click on the Windows icon and select the Terminal (Admin) option from the Quick Links menu.

- Click on the Yes button in the User Action Control window to open Windows PowerShell with administrative rights.
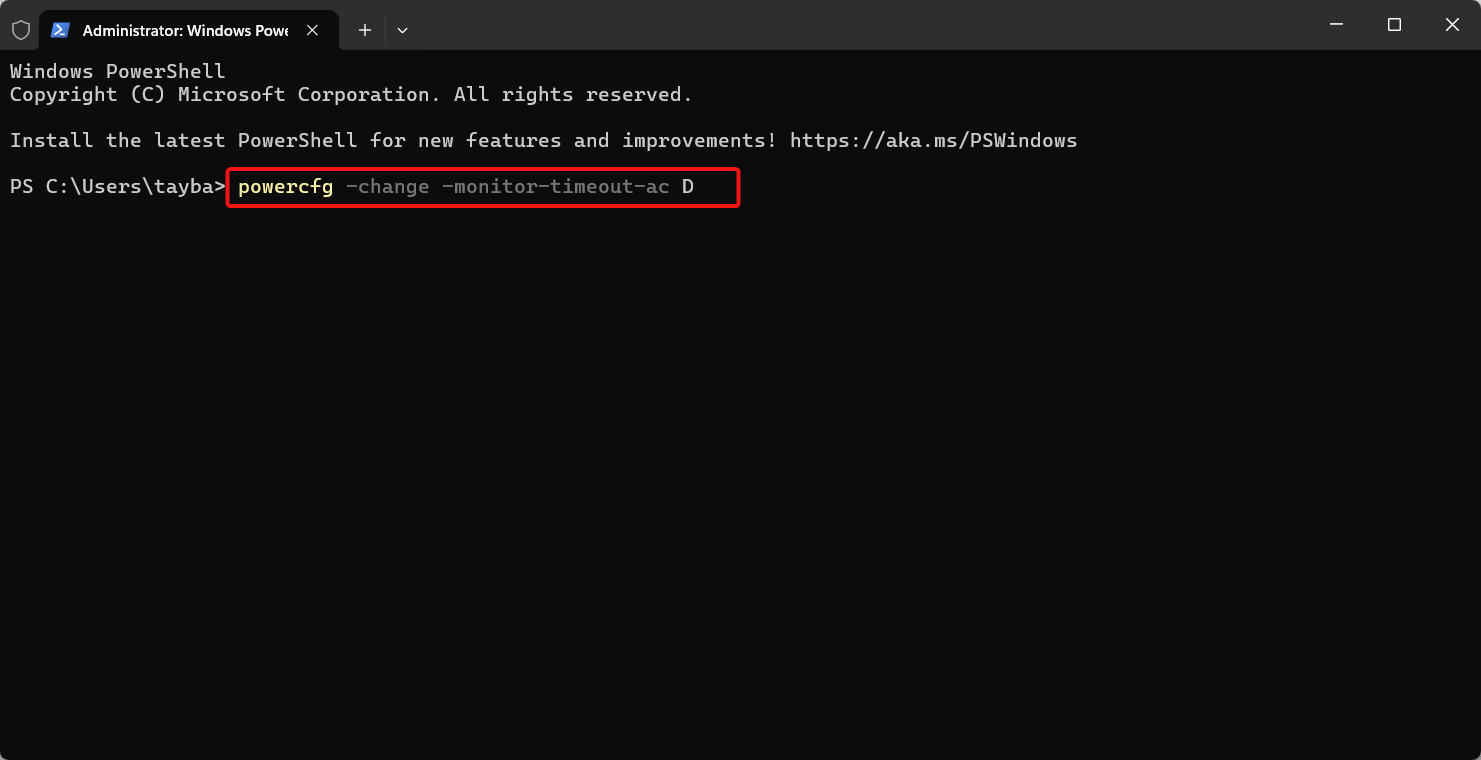
- Type or paste the following command and press Enter to set the screen timeout duration. Replace D with the screen timeout duration in seconds.powercfg -change -monitor-timeout-ac D

5. Modify Screen Timeout Duration Using Windows Registry Editor
Beyond other settings, you can configure the screen timeout settings in Windows 11 using the Windows Registry Editor. This method has the advantage of overriding other Windows settings. However, you must exercise caution while editing the Windows Registry to avoid causing issues with your Windows 11 PC. Let’s proceed with changing the screen timeout using the Registry Editor:
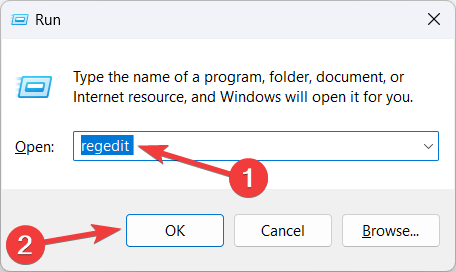
- Invoke the Run dialog box by pressing the Windows + R key combination. Type regedit into the search bar and hit Enter to run the command.

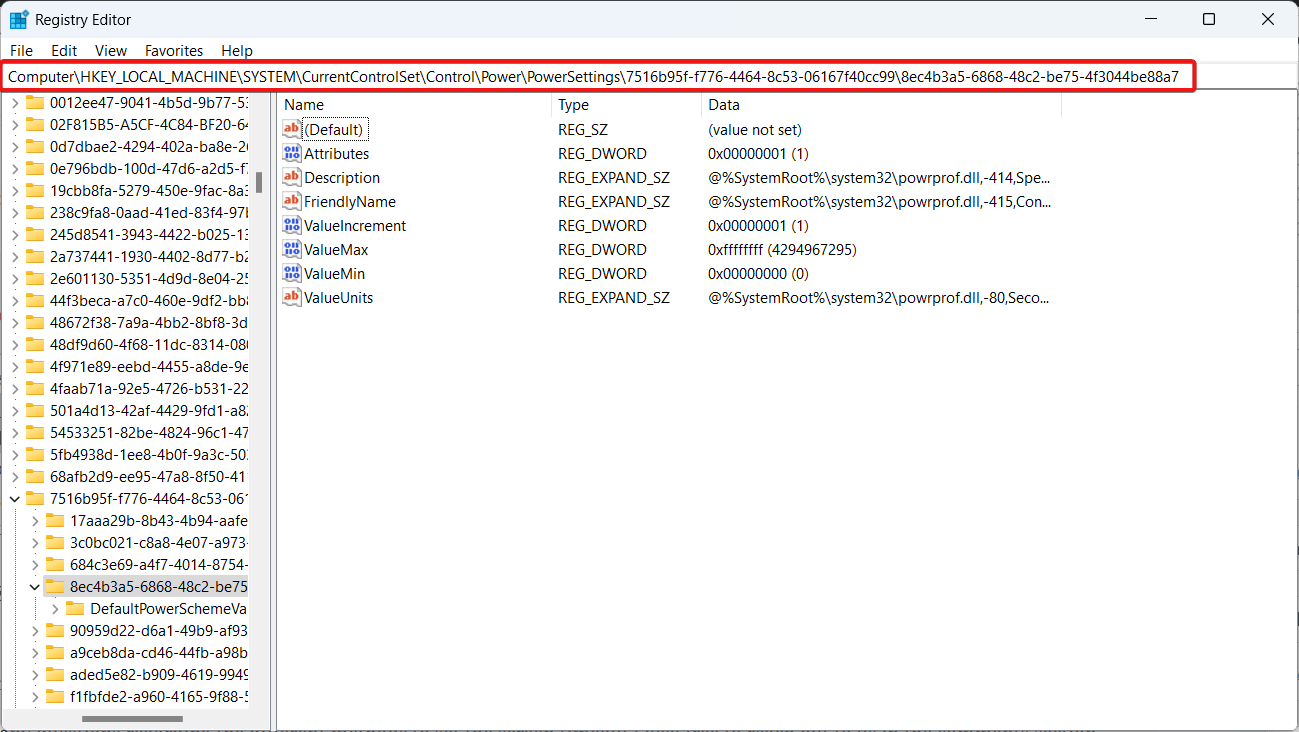
- In the address bar at the top, navigate to the following location:HKEY_LOCAL_MACHINESYSTEMCurrentControlSetControlPowerPowerSettings7516b95f-f776-4464-8c53-06167f40cc998EC4B3A5-6868-48c2-BE75-4F3044BE88A7

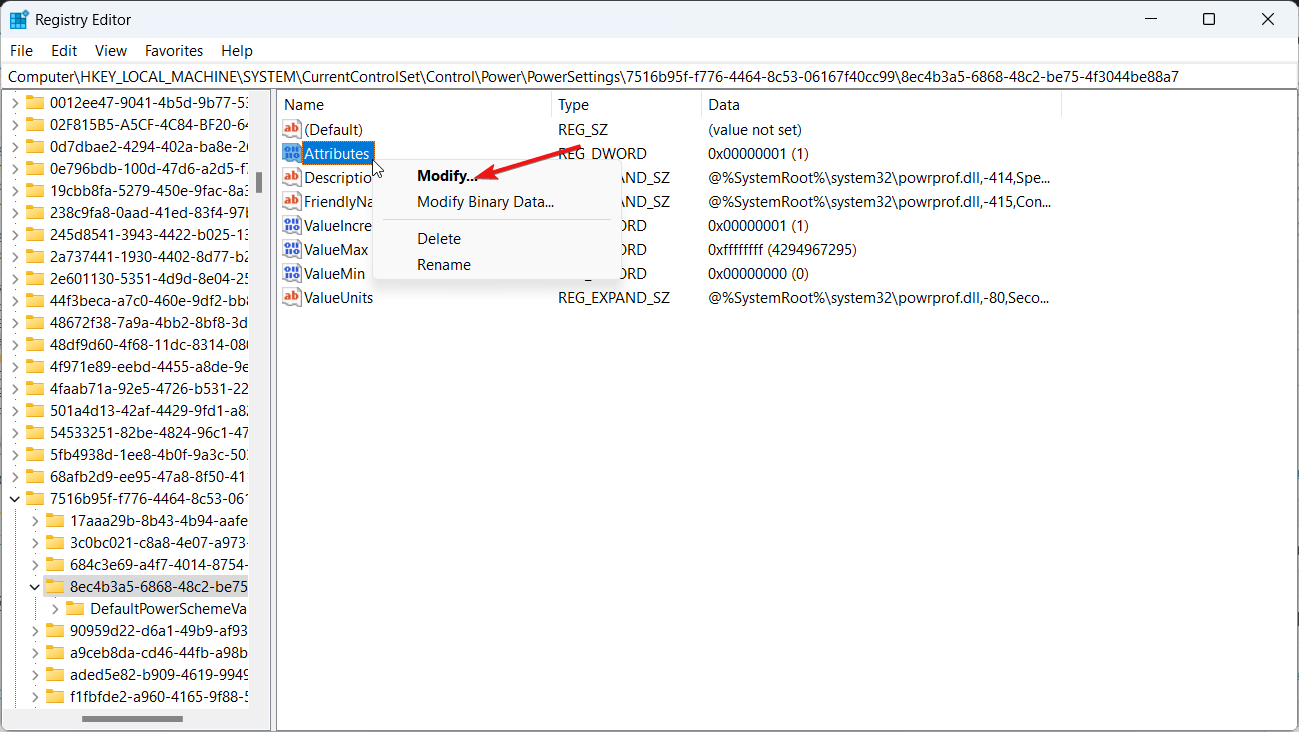
- Locate the Attributes entry on the right side of the Registry Editor window. Right-click it and select Modify from the context menu.

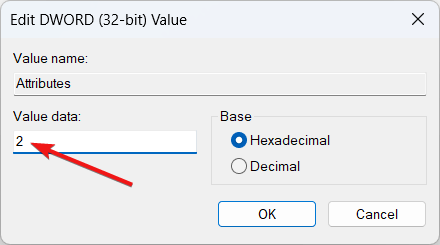
- Enter 2 in the Value Data field and click OK to save the changes.

- Finally, close the Registry Editor window and restart your Windows PC to apply the changes.
Conclusion
That’s it! The methods discussed above can help you effortlessly adjust the screen timeout settings to suit your preferences. Once set, your device will automatically turn off the screen after the specified period of inactivity on your Windows 11 PC.
If you have any questions about the different methods for setting the screen timeout, feel free to ask in the comments section.

