Struggling to remove a file or folder on Windows 11? It’s a frequent issue that can occur for various reasons, particularly when you are trying to free up disk space.
I’ve encountered this issue myself several times, but luckily, there are a few solutions to get past this. In this guide, I’ll walk you through the most effective methods to force-delete a file or folder on Windows 11. Let’s dive right in.
Common Reasons for Cannot Delete a File or Folder in Windows 11
One of the primary reasons you can’t delete a file or folder is that it’s in use by an application or service, preventing its deletion and prompting an error message.
Furthermore, if a file or folder is locked, you won’t be able to modify, move, or remove it. Other contributing factors include:
- Lack of necessary permissions to modify the file or folder.
- The file or folder is shared with other users.
- The presence of malware or viruses.
- Corrupt file structures.
Solutions for Fixing Unable to Delete Files or Folders
Here are some highly effective solutions to help you delete a stubborn file or folder on a Windows computer. Let’s explore them.
1. Use Command Prompt to Force Delete
Using the Command Prompt is one of the most straightforward methods to force delete a file or folder in Windows. Follow these steps:
- Press the Windows key to open the start menu.
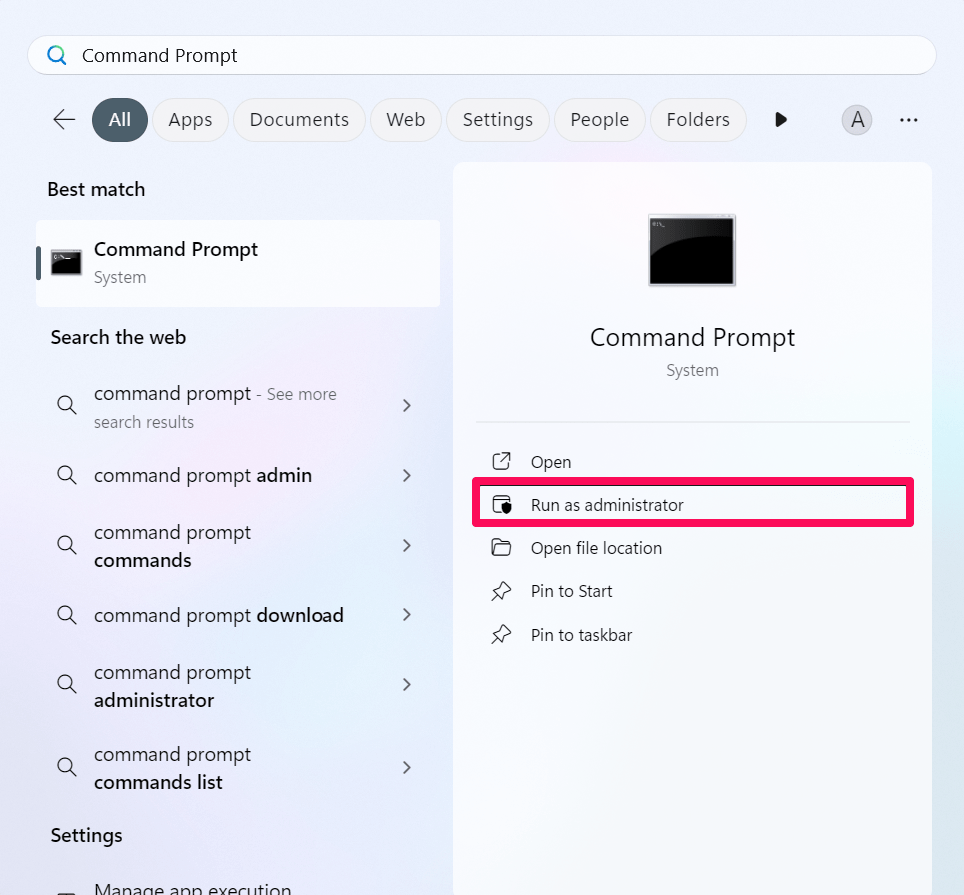
- Type “Command Prompt” in the search bar and select “Run as administrator.”

- When prompted by the User Account Control (UAC), click Yes.
- In the Command Prompt window, type
delfollowed by the file or folder path:del C:Usersuserfolder-namefilename.extension - Press Enter, and the file or folder should be removed.
2. Use Safe Mode to Delete a Folder
If the Command Prompt method fails, try deleting the file or folder in Safe Mode. Safe Mode can help resolve many common issues and identify problematic third-party software.
- Press Windows + I keys to open Settings.
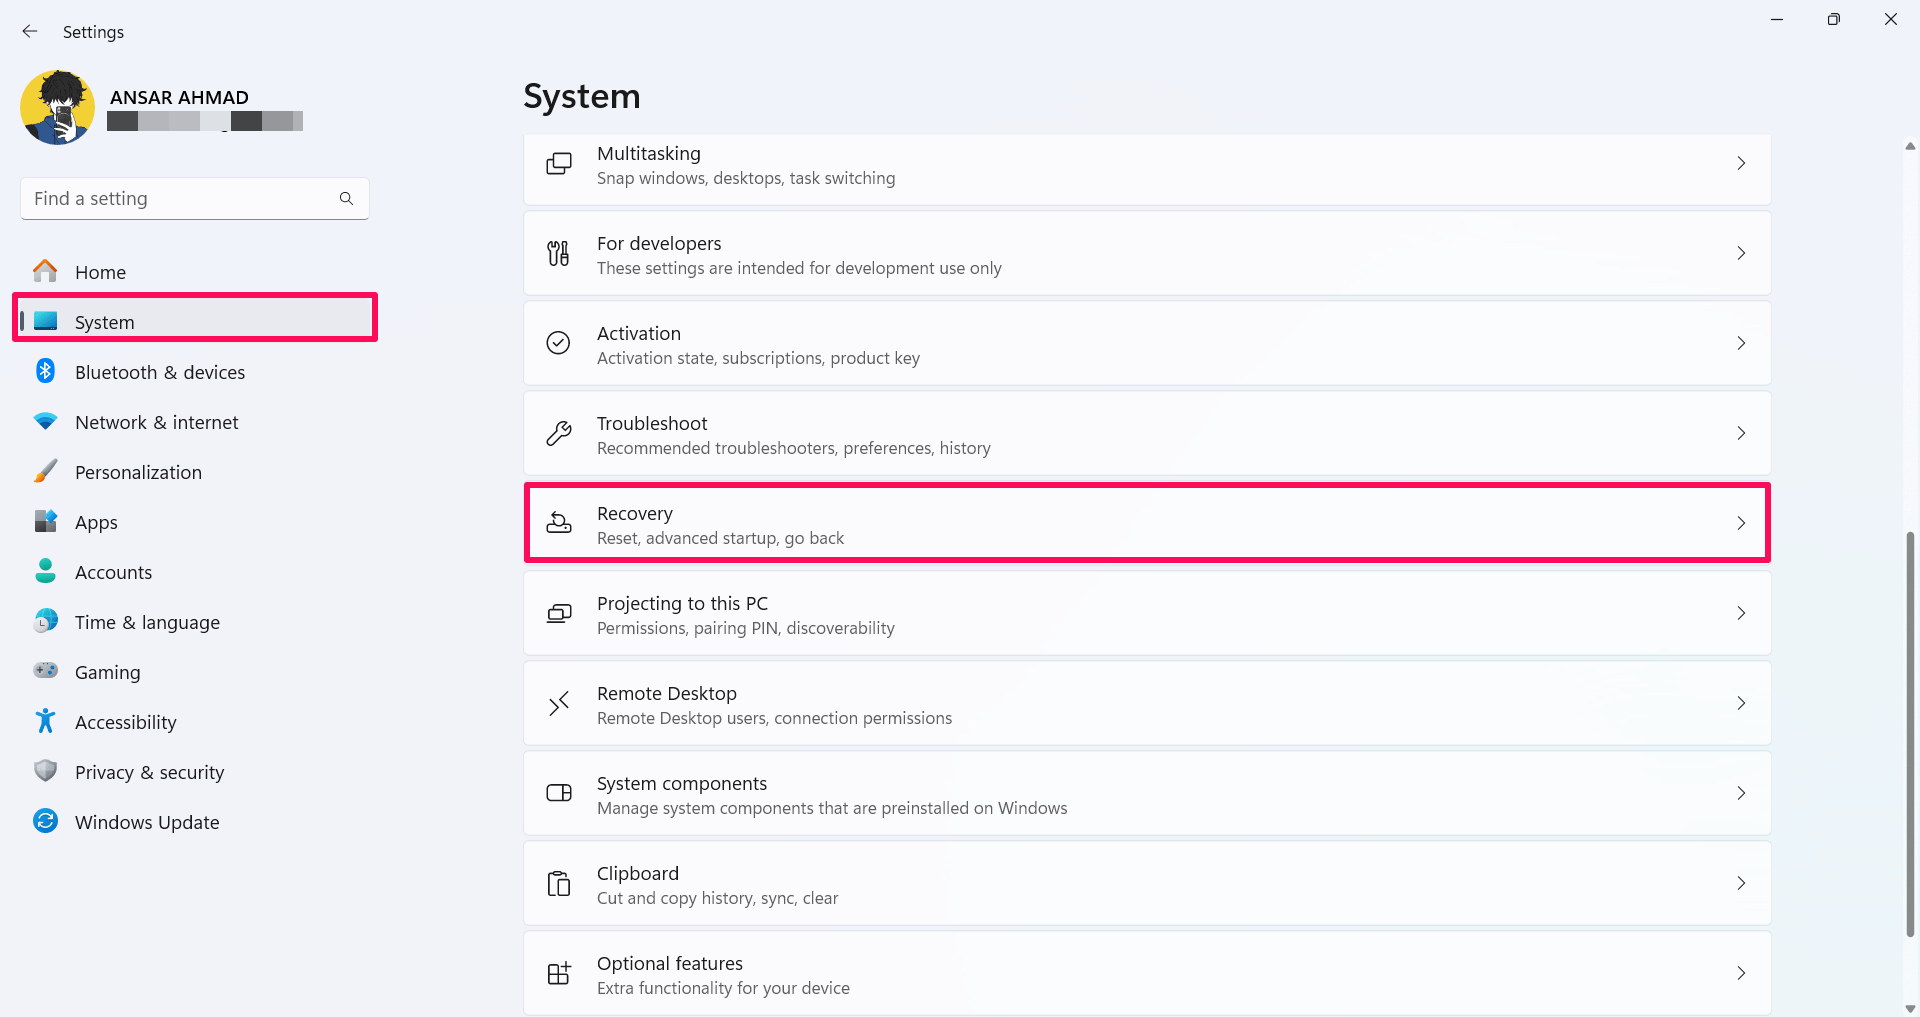
- Navigate to System and select “Recovery.”

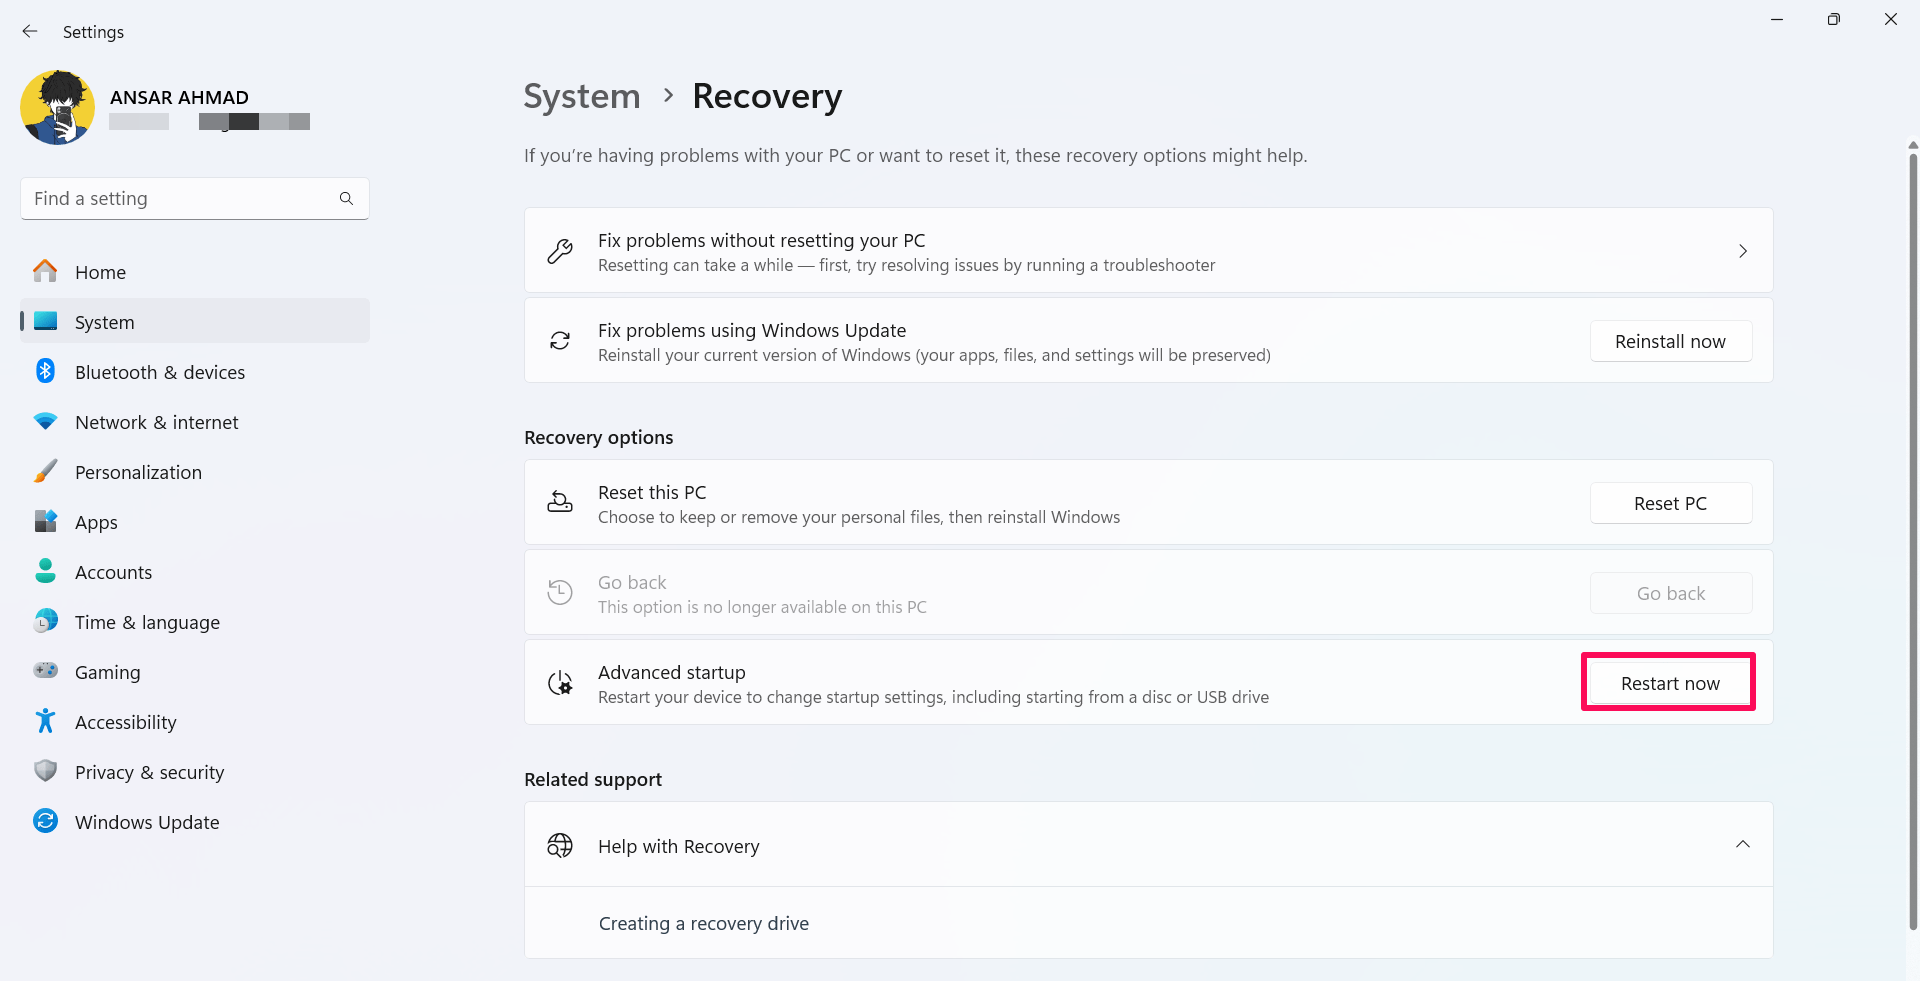
- Under Recovery options, click “Restart now” next to Advanced startup.

- Confirm by clicking Restart now again. Your PC will reboot.
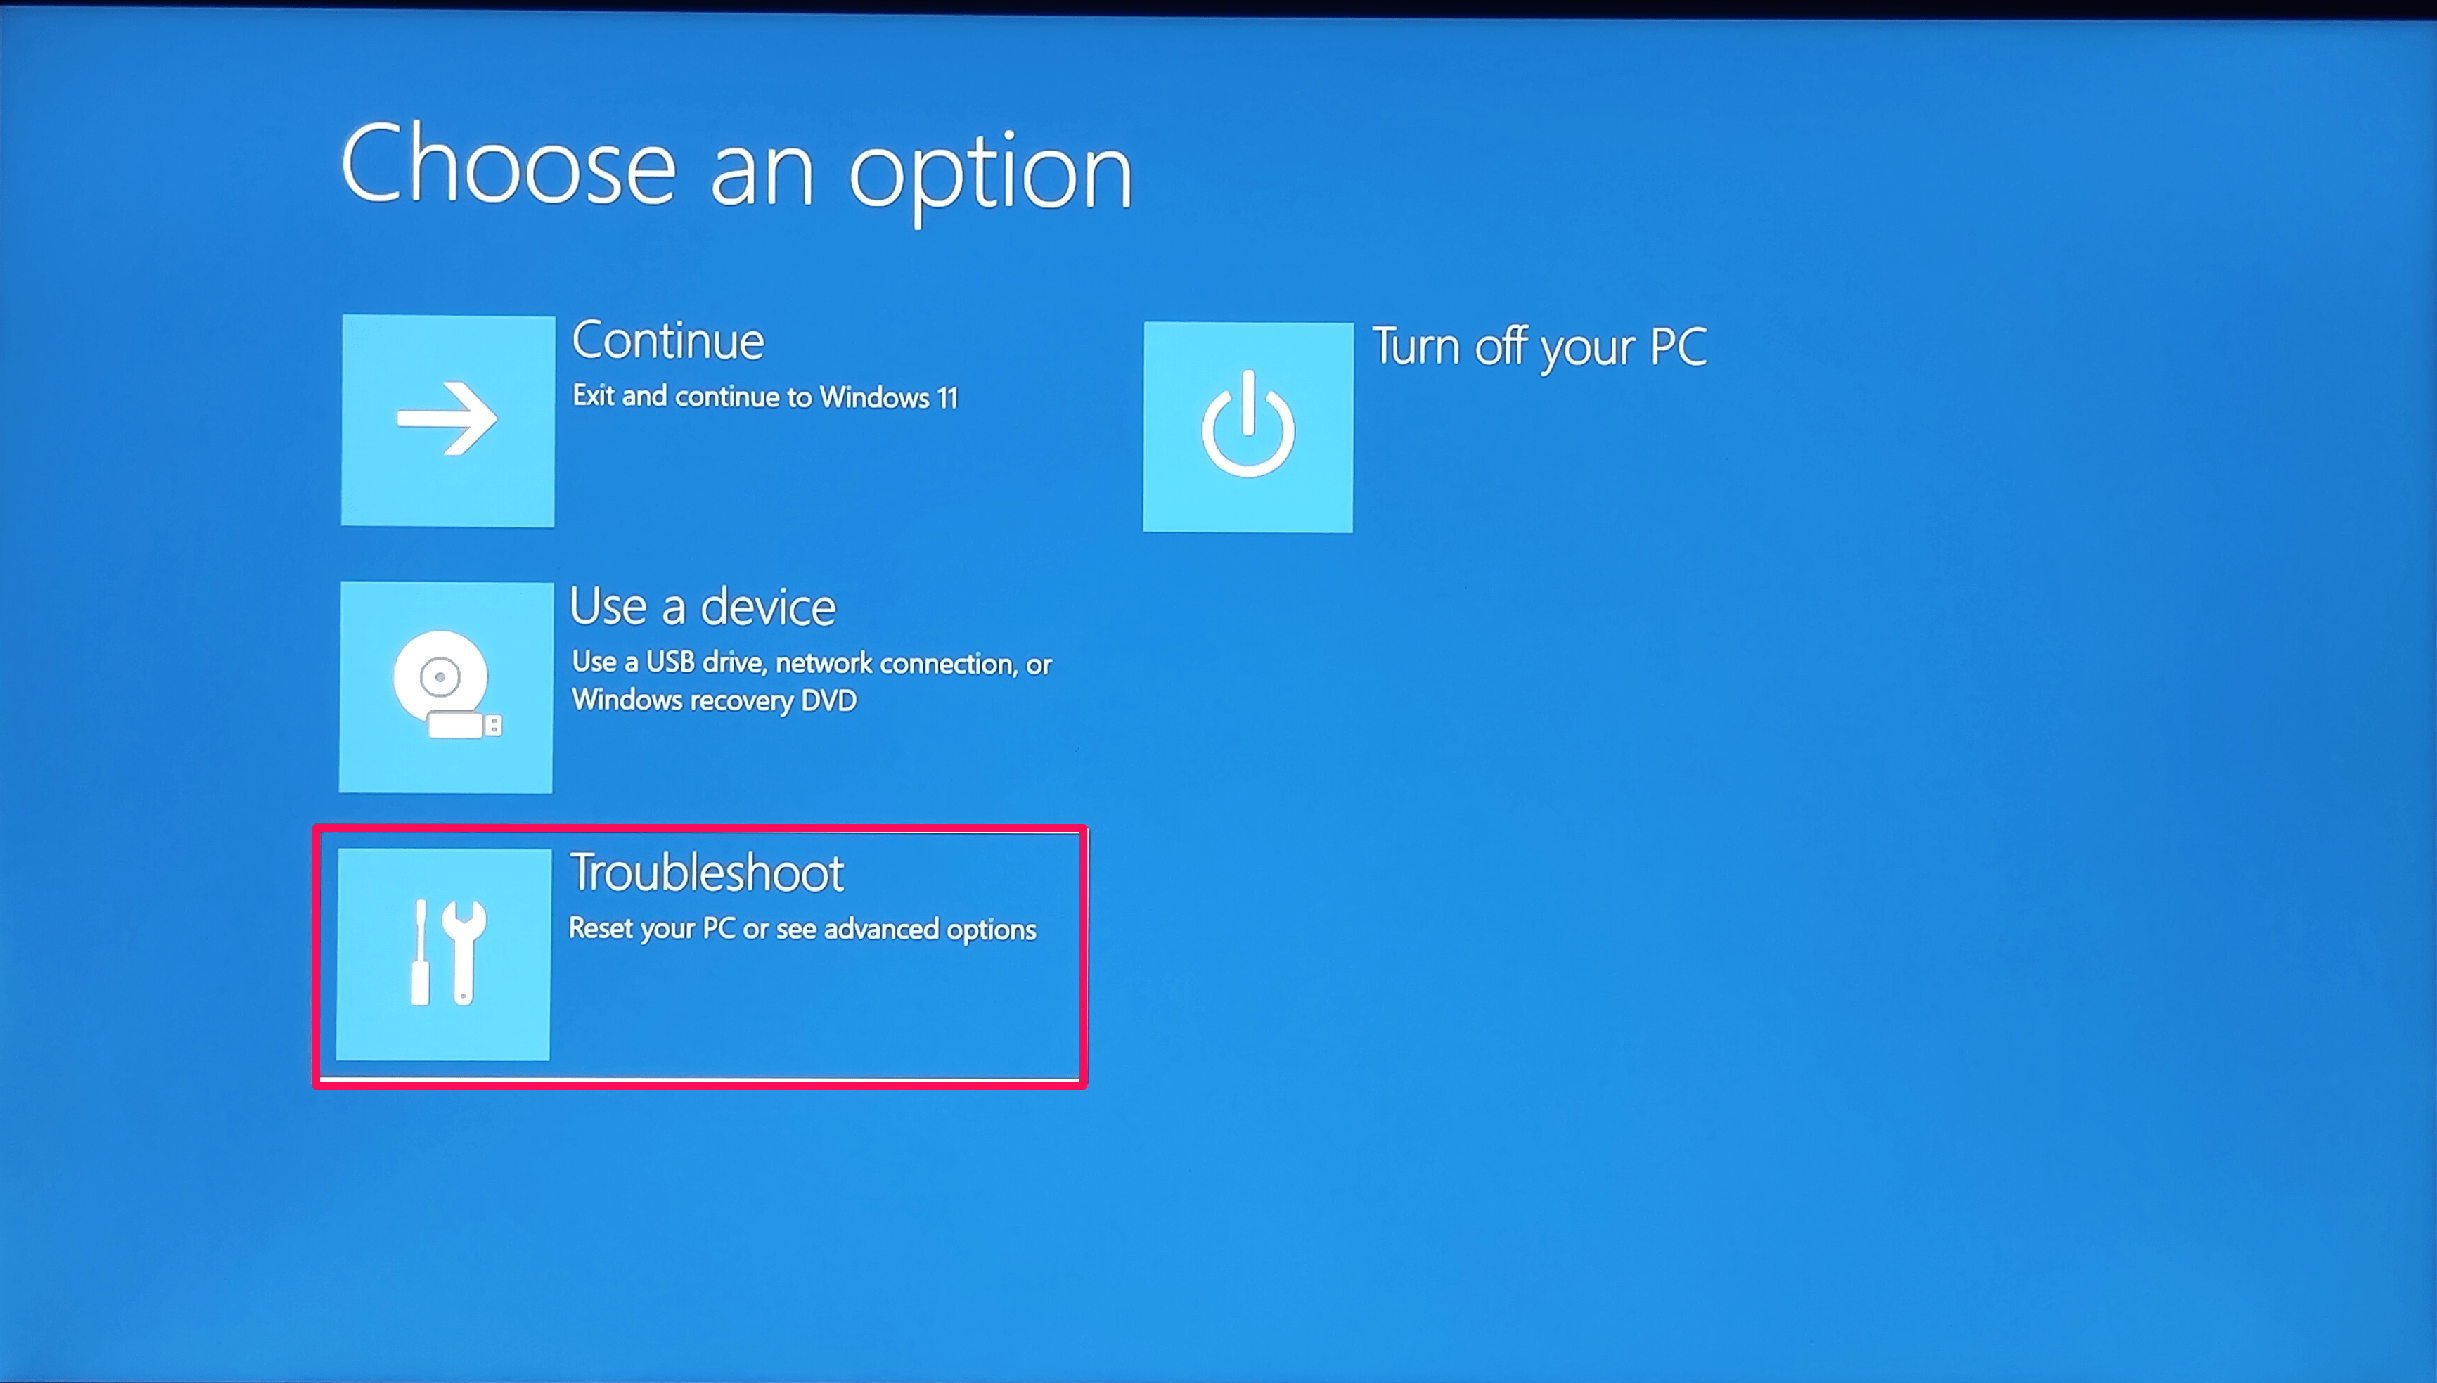
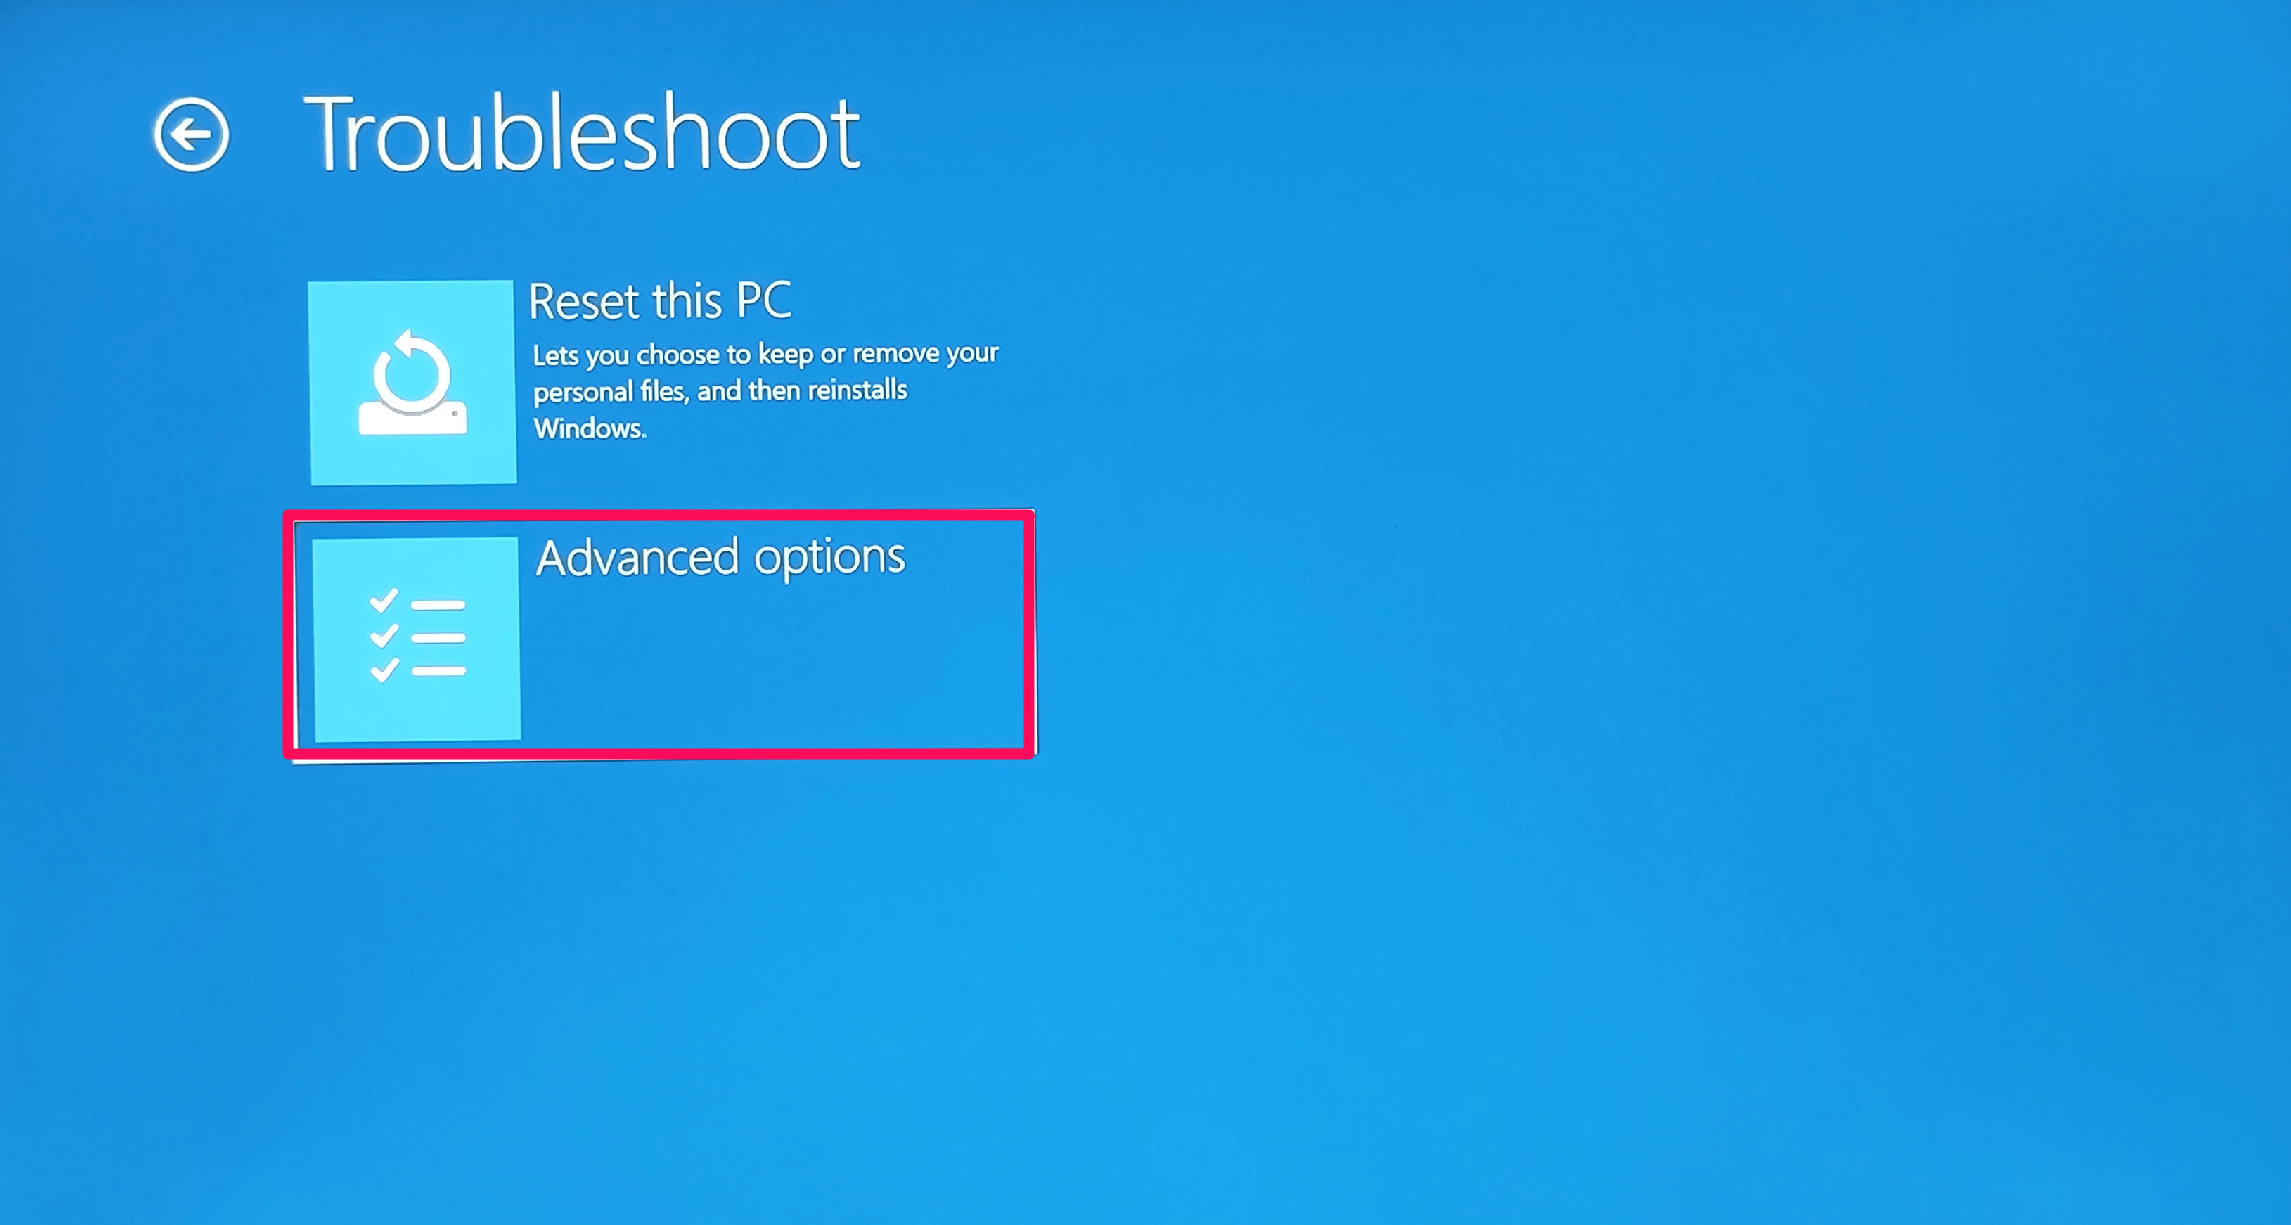
- Under Advanced options, select Troubleshoot.

- Choose Advanced options.

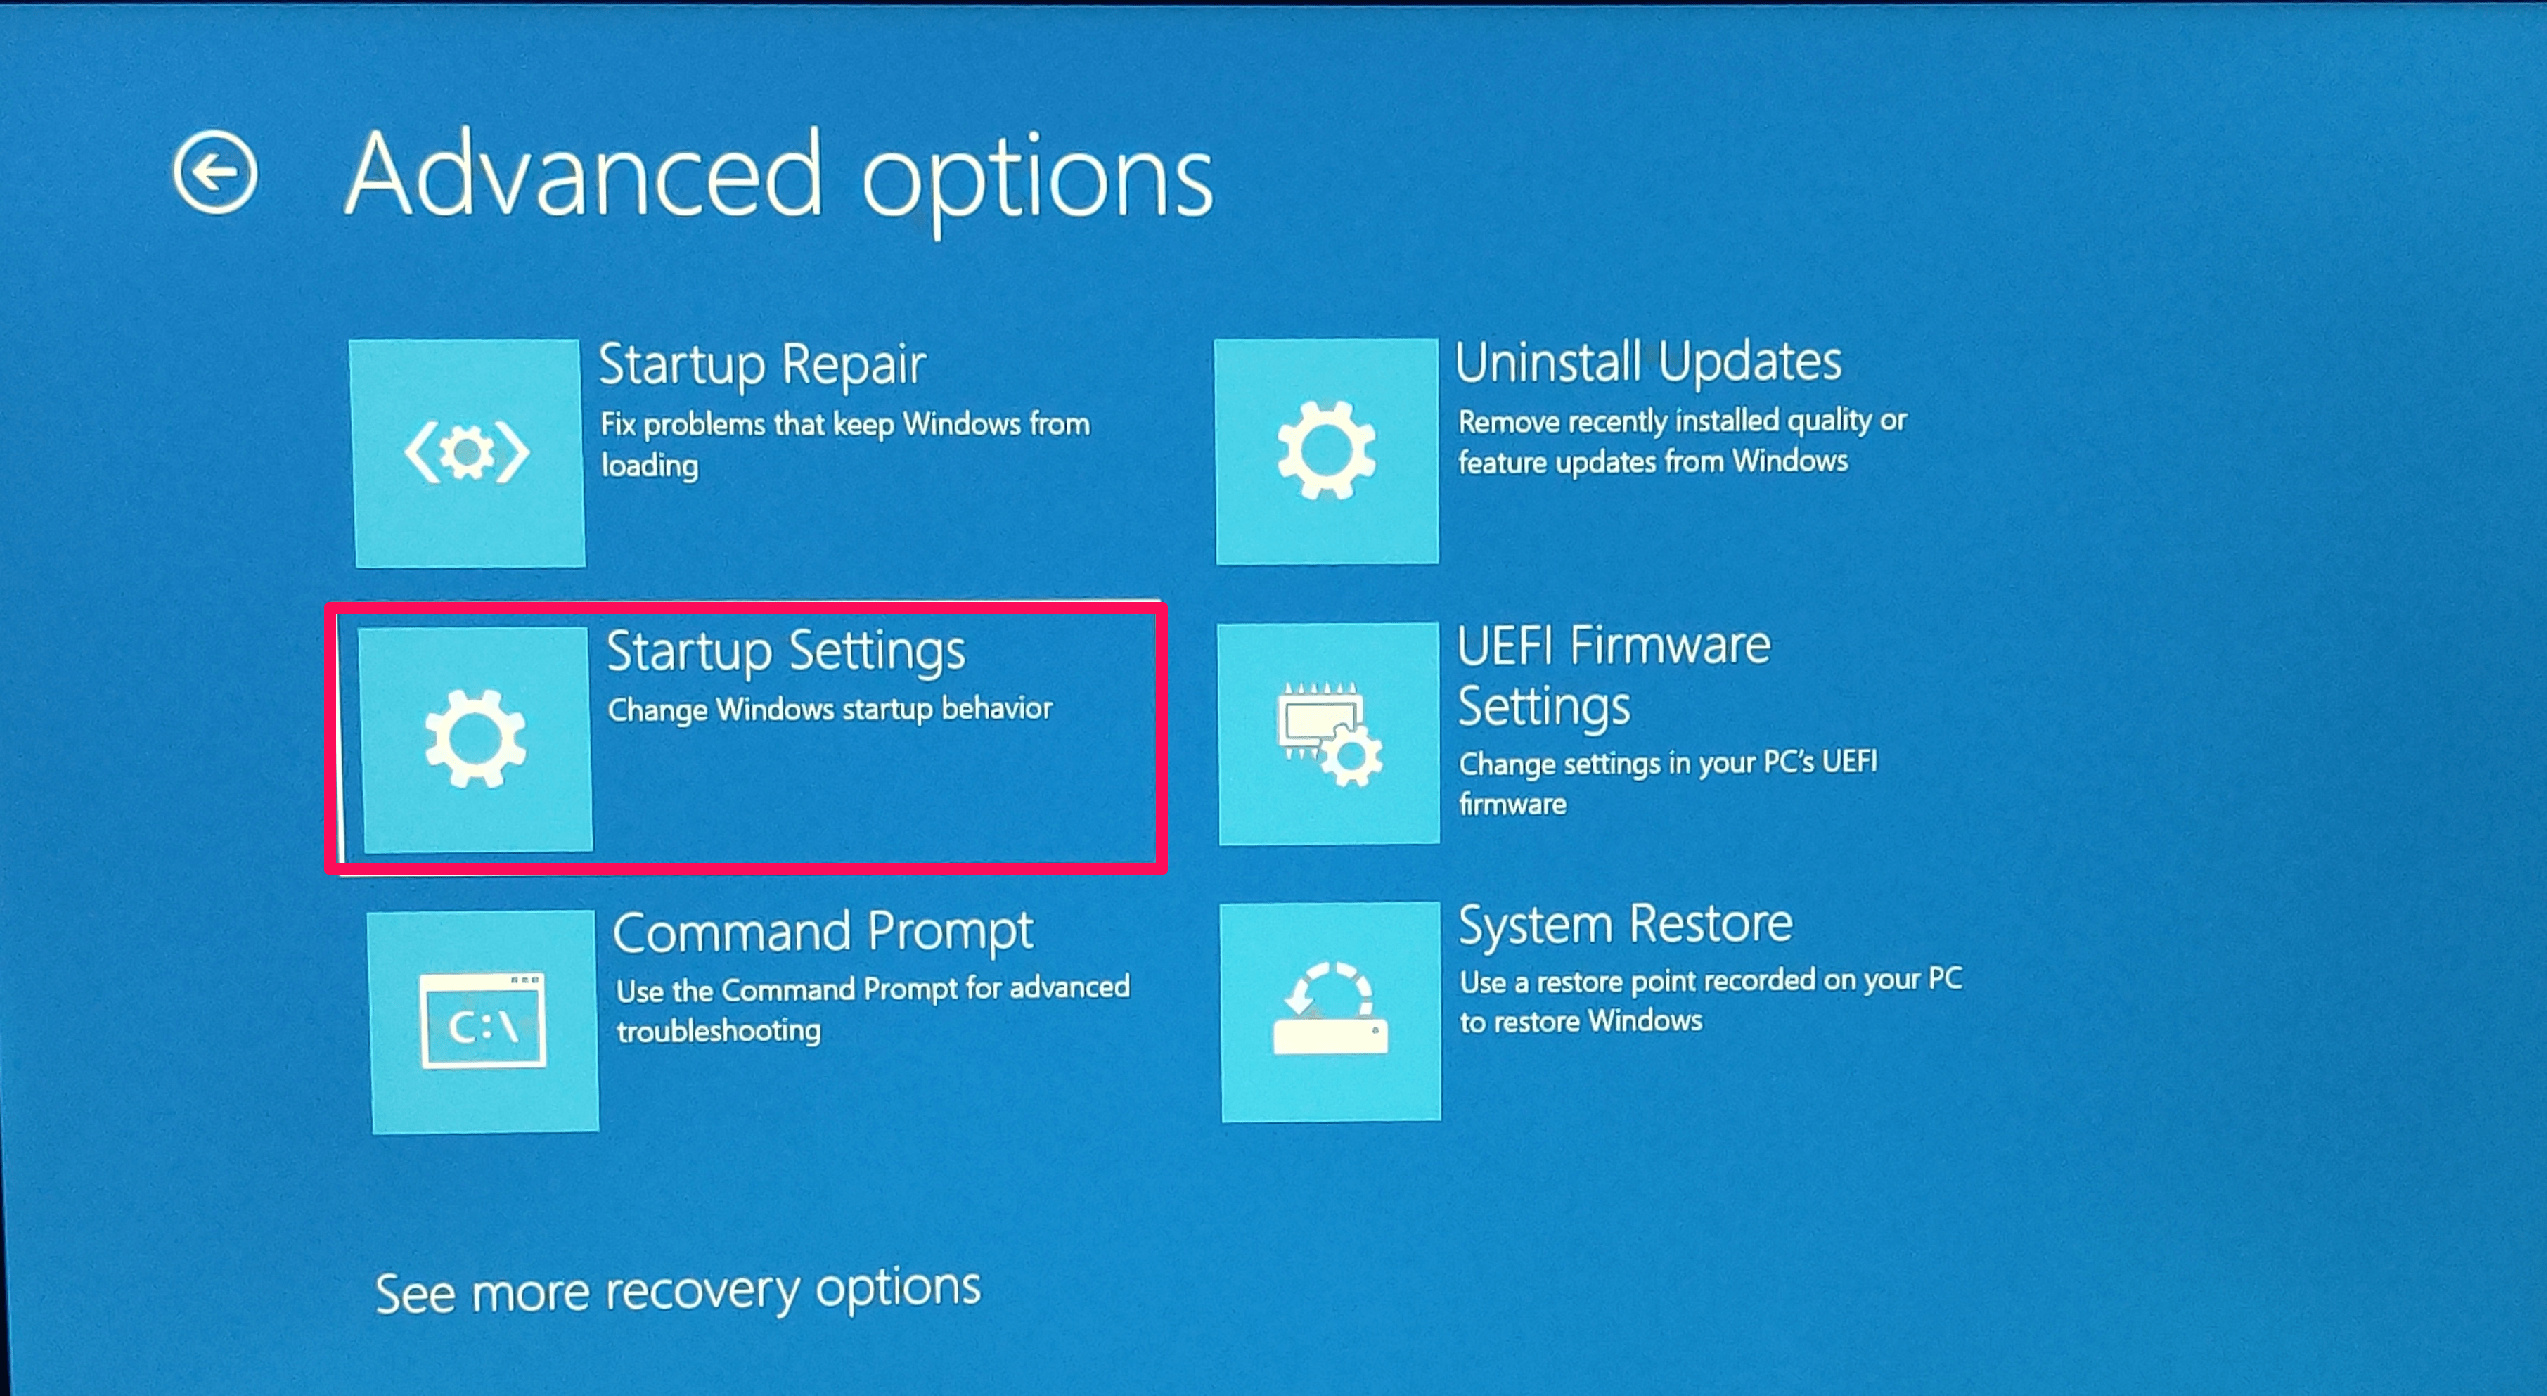
- Under Advanced options, select Startup Settings.

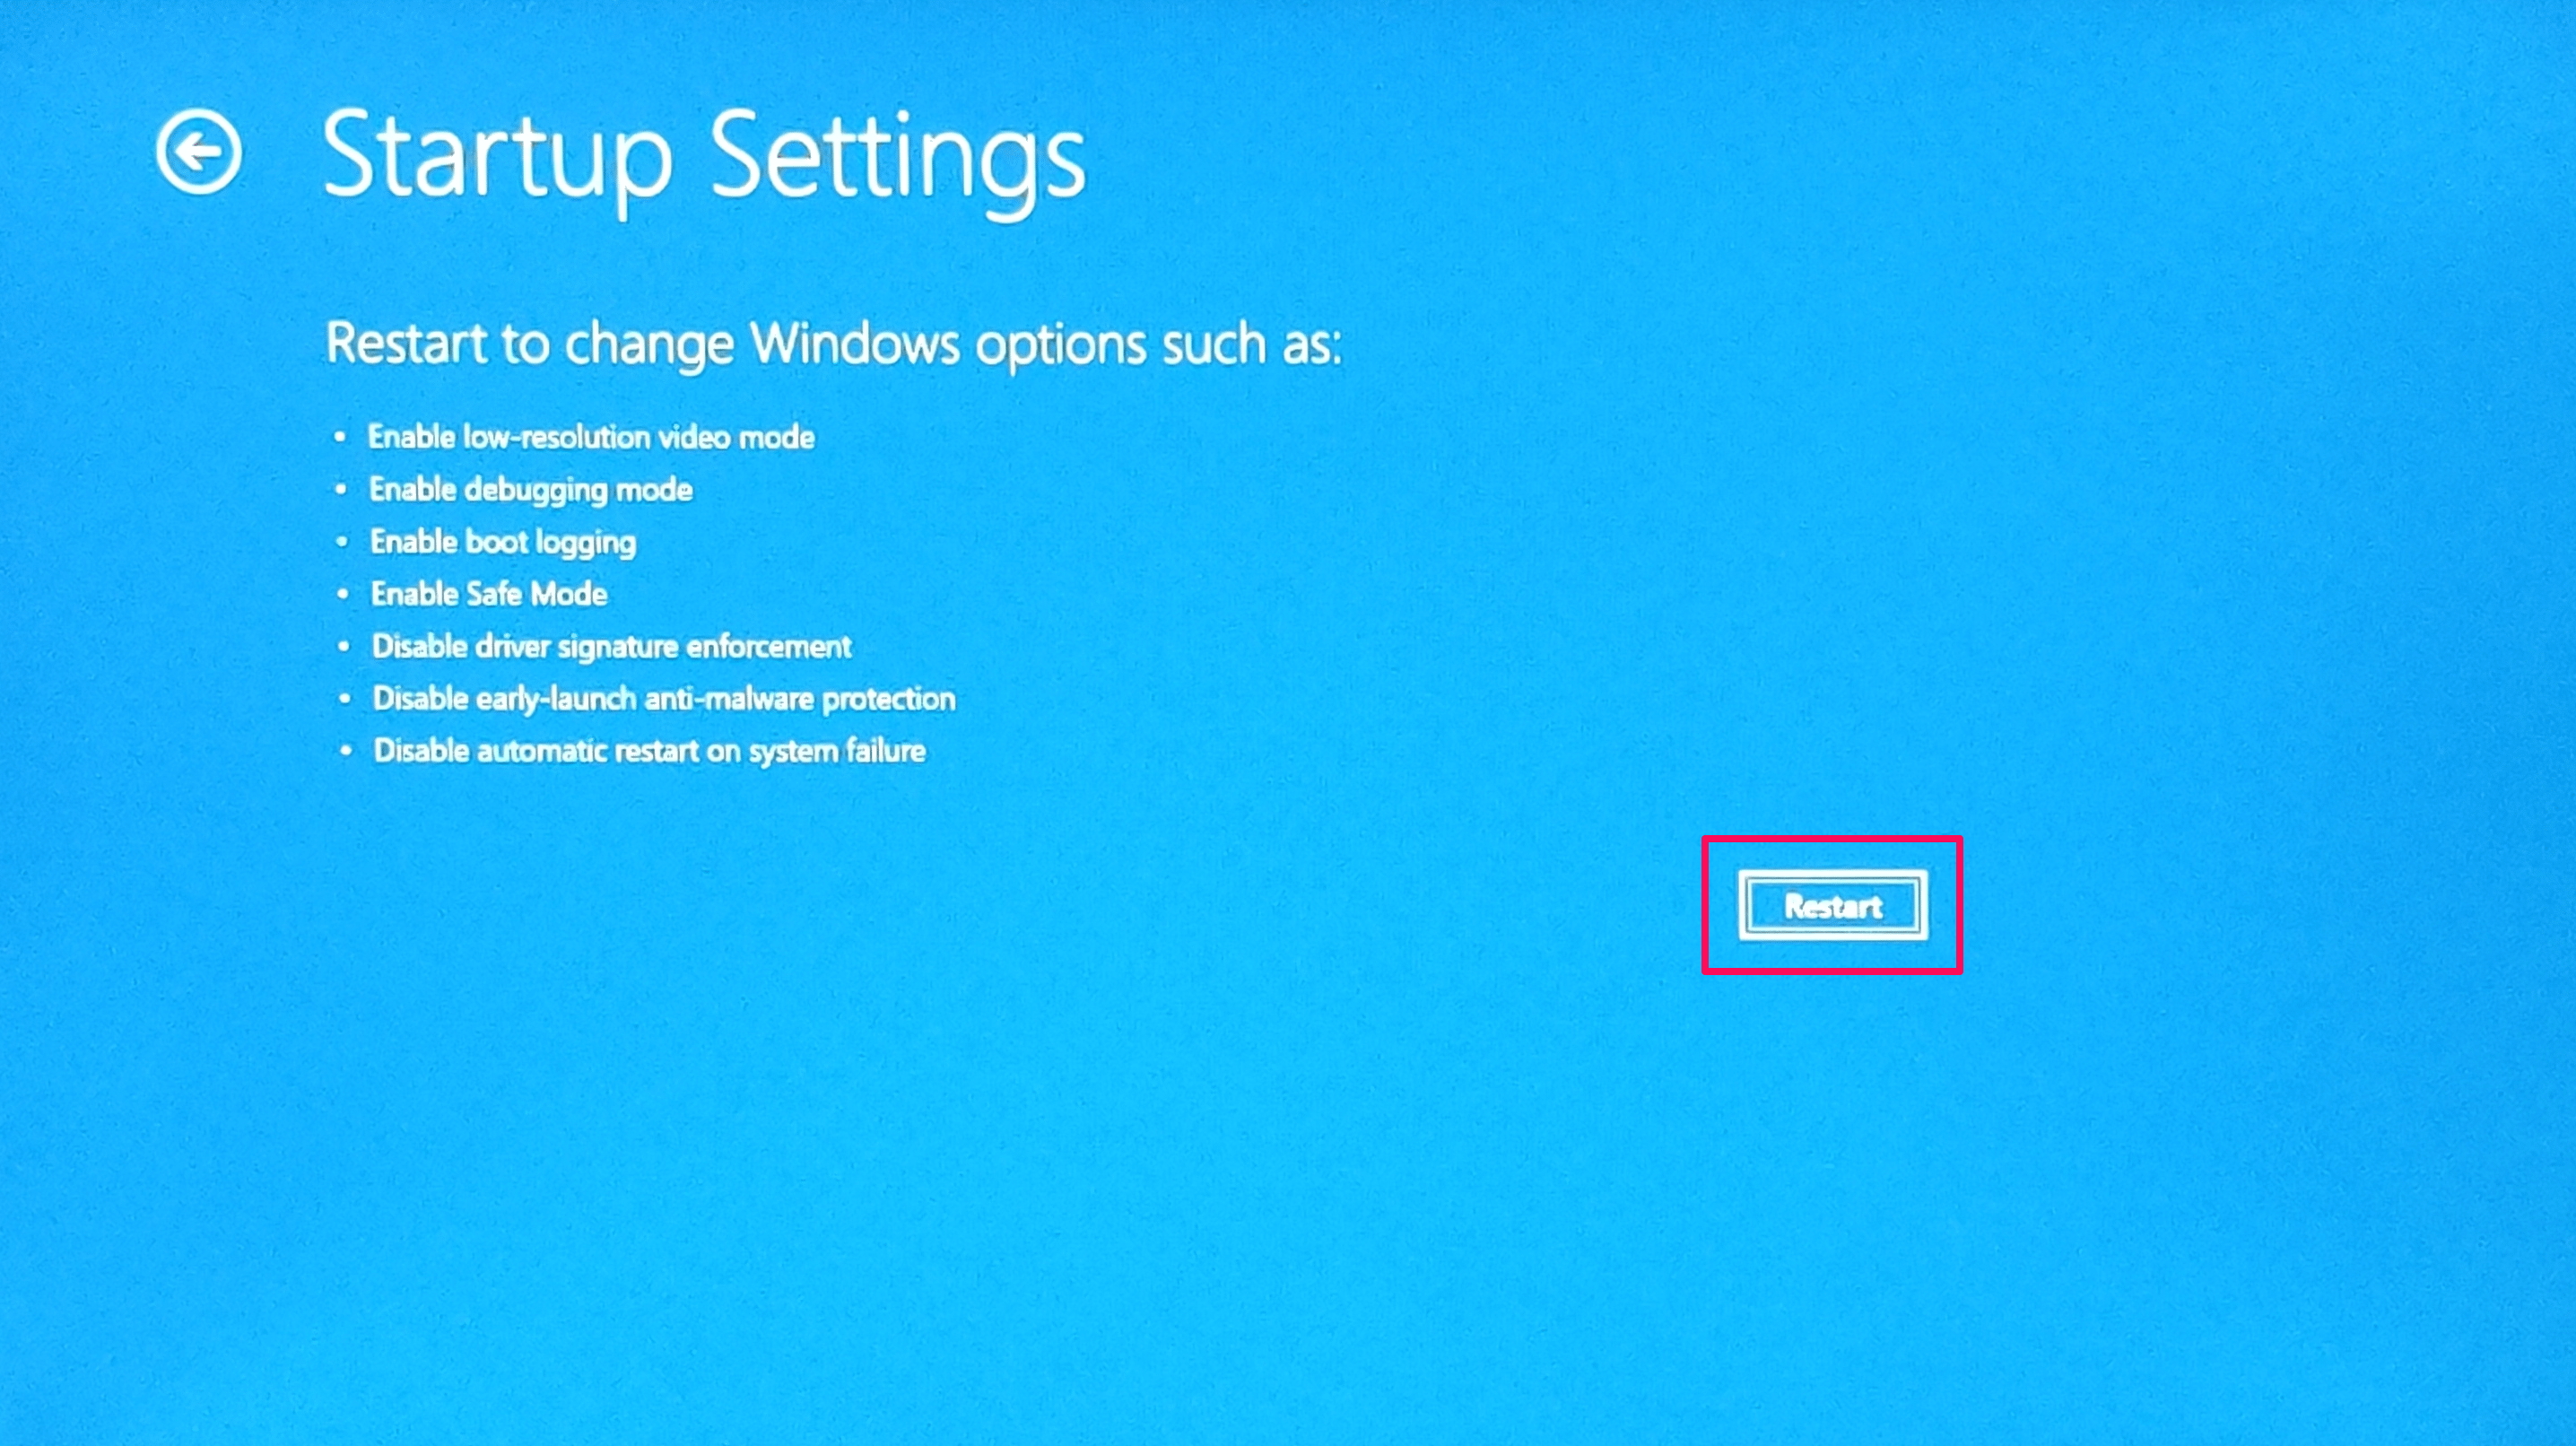
- Click Restart and immediately press F4 when it begins to boot.

- Once you press F4, your computer will boot into Safe Mode.
- Navigate to the file or folder path and delete them.
- Reboot your PC to exit Safe Mode.
3. Use Keyboard Shortcut to Force Delete
Another simple yet effective way to force delete files or folders is by using keyboard shortcuts. Here’s how:
- Navigate to the file or folder you want to delete.
- Select the item, then press and hold the Shift + Delete keys simultaneously.
- This action will permanently delete the selected file or folder.
Frequently Asked Questions
Why can’t I delete a folder in Windows 11?
You might be unable to delete a folder if it is currently being used by a program or service. Additionally, folder directory corruption could also be a cause.
Is it safe to force delete a file or folder?
Yes, it is safe as long as you are certain about the file or folder you are deleting. Remember, once deleted permanently, recovery is generally not possible.
How can I use keyboard shortcuts to delete files or folders in Windows?
To delete files or folders using keyboard shortcuts, select the item and press Shift + Delete together. This will permanently remove the item from your system.
Final Thoughts
Following these methods should help you successfully delete any file or folder on Windows 11. Errors when deleting files can be annoying, but these solutions are designed to rectify such issues. I hope you found this guide useful.
If you have any comments on How to Force Delete a File or Folder in Windows 11, feel free to leave them in the comment section below. Cheers!

